Indoor Garden Shelves: How to Set Up a Plant Shelf That Works
Turn a shelf unit into a working growing area: how to choose between open and solid shelves, respect the load rating, position the unit for light, space the levels, protect them from water and arrange plants by brightness.
At a glance
What you need
- Shelf unit with a stated load rating
- Wall fixings supplied with the unit
- Waterproof tray or liner per level
- Tape measure
- Saucers for individual pots
- Light bar per level, if needed
A shelf unit multiplies the space a single patch of floor can give to plants, which is why indoor garden shelves are one of the most practical growing areas in a home. The catch is that a shelf built for books is not automatically a good place for pots: the levels shade each other, water has to go somewhere, and the whole thing gets heavy.
Setting one up well is mostly a matter of doing things in the right order. Choose the unit and its position first, then deal with spacing and water, and only then arrange the plants.
What you need
- A shelf unit with a stated load rating per shelf
- The fixings and instructions supplied with the unit
- A waterproof tray or liner for each level
- A tape measure
- Saucers for individual pots, if you are not using long trays
- A light bar per level, if natural light will not reach the shelves
Step by step: setting up the shelf
- Choose the unit. Decide between open and solid shelves, and check the load rating before anything else (both are covered below).
- Pick the position. Stand the unit beside or facing a window if natural light is going to do the work. If it has to go on a dim wall, plan a light for each level from the start.
- Assemble and secure it. Build the unit on a level floor and fix tall units to the wall as the unit’s instructions describe.
- Set the shelf spacing. Measure your tallest plant for each level, pot included, and leave room above it for growth and, where needed, a fixture.
- Protect every level. Lay a waterproof tray or liner on each shelf before any pot goes on.
- Load from the bottom. Put the largest, heaviest pots on the lowest level and work upward to the smallest.
- Arrange by light. Give the brightest positions to the plants that want the most light.
- Leave access. Keep a gap or a lightly filled level so you can reach in, lift pots out and water without knocking things over.
Choosing the unit: open or solid shelves
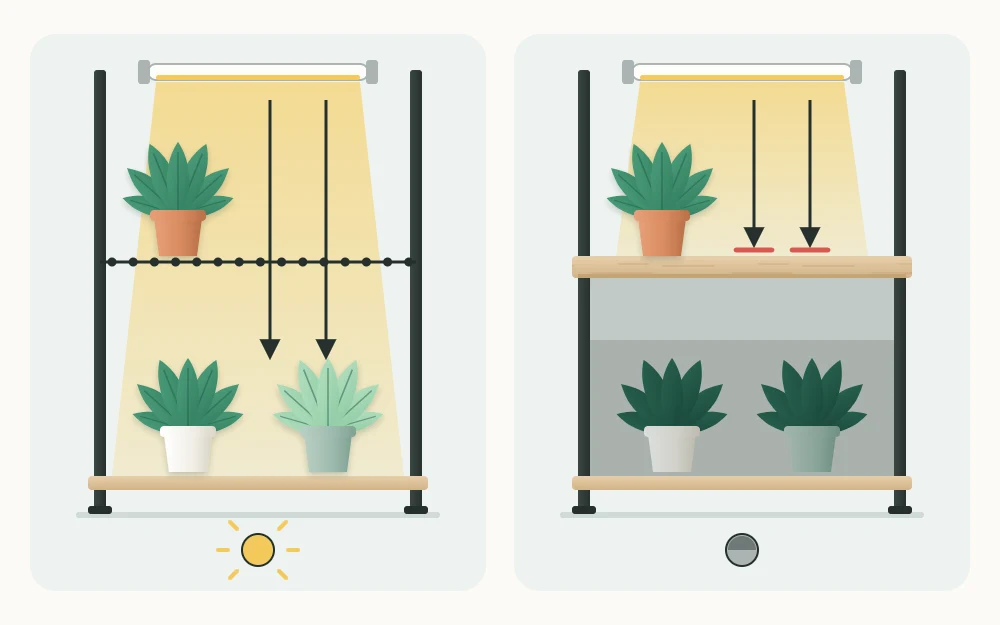
Open wire or slatted shelves let light and air pass through, so the level below still receives some of what comes in from above and from the side. Solid shelves block it: each board casts a shadow on the level beneath, and only the front and window-side edges stay bright.
Neither type is wrong. A solid-shelf unit works well when every level faces a window directly or has its own light. An open wire shelving unit suits a spot where light arrives mostly from above or at an angle. Wire shelves do let drips through, though, so trays matter even more.
Weight, load ratings and fixing to the wall
Wet pots are heavy. A pot that feels manageable when the potting mix is dry weighs noticeably more after watering, and a row of them, plus trays, adds up faster than most people expect. Ceramic and terracotta containers add their own weight on top.
Find the load rating the manufacturer states for each shelf and for the unit as a whole, and plan the planting to stay within it. If a unit has no stated rating, treat that as a reason to choose a different one for plants. Keep the heaviest pots on the lowest level, which also makes the unit steadier.
Good to know
Tall, narrow units can tip, especially once the upper levels are loaded. Fix them to the wall with the method the unit’s instructions give for your wall type, and use the product’s stated load rating as the limit for every shelf. If the instructions do not cover your wall, ask the manufacturer or a competent tradesperson.
Position and light on each level
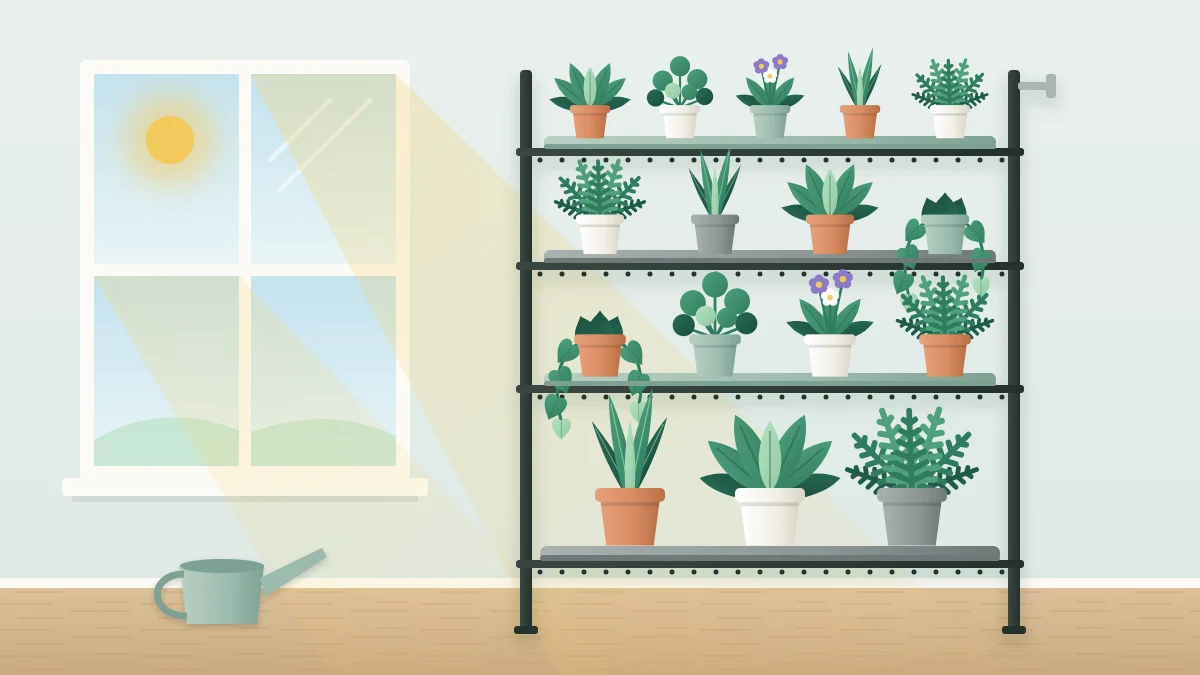
Light on a shelf is uneven in two directions. The top level is usually the brightest because nothing stands above it. On every level, the edge nearest the window is brighter than the far edge, and the difference can be large across even a shallow shelf.
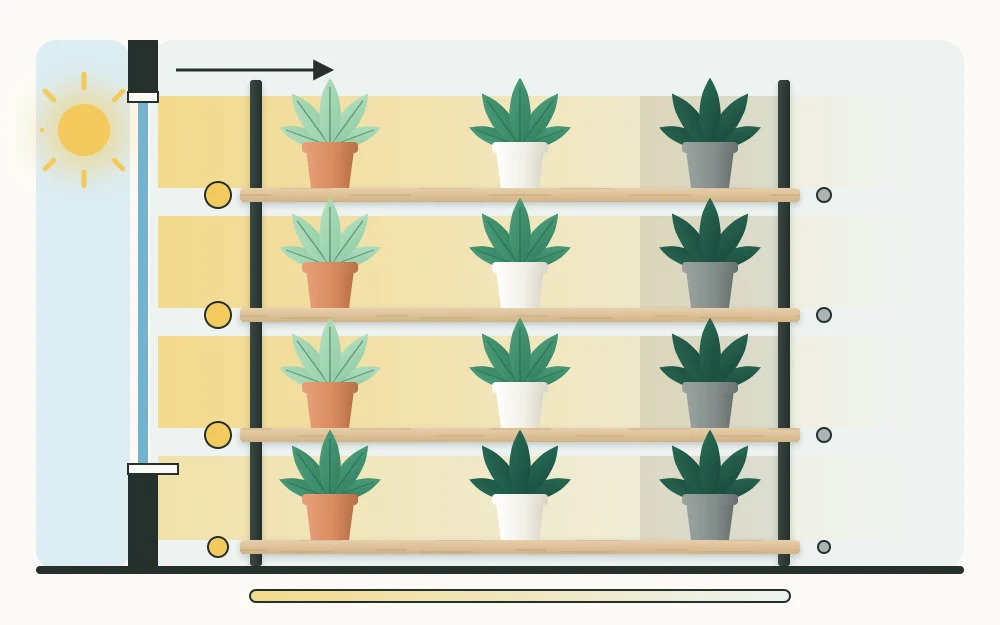
Standing the unit side-on to a window gives every level a bright end and a dim end. Facing the window gives a more even front row but a darker back.
Where the window cannot do the job, plan one light per level, mounted under the shelf above. The guide to grow light basics explains which fixture shapes suit a shelf and how to set them up by the manufacturer’s instructions. Decide this before you set the shelf heights, because a fixture takes up part of the gap.
Spacing between shelves
Measure each plant from the base of its pot to its highest leaf, then add room for growth and for your hand. As a starting point, leave roughly 4 to 6 in (10 to 15 cm) above the tallest plant on a level; the right gap depends on the plants and on whether a fixture hangs there.
Adjustable units make this much easier. A mix of one tall gap and several shorter ones usually fits a varied collection better than equal spacing throughout.
Trays and water
Every level needs something waterproof under the pots, because water that escapes on an upper shelf lands on the plants, the shelf and the floor below. Long trays that span the shelf are tidier than a row of saucers and catch splashes between pots. Whichever you use, empty standing water after watering so pots do not sit in it.
How to pair pots, saucers and trays so the roots drain properly is covered in the guide to drainage for indoor pots. Many people find it easiest to carry shelf plants to a sink, water them there, let them drain and return them.
Arranging the plants
With the practical layer in place, sort plants by the light each position offers: the most light-hungry at the top and on the window side, the more tolerant ones lower and farther in. Trailing plants suit shelf edges where the stems can hang clear without shading the level below too heavily.
Within those limits you can make the shelf look composed instead of crowded; the article on indoor plant display ideas goes through height, repetition and empty space. If floor area is the real constraint and you want to use the wall itself, an indoor vertical garden is the next step up from a freestanding unit.
Frequently asked questions
How much weight can a plant shelf hold?
That depends entirely on the unit, so the only reliable figure is the load rating the manufacturer states for each shelf. Remember that pots weigh noticeably more just after watering, and that trays and ceramic containers add to the total. Keep the heaviest pots on the lowest level and stay within the stated rating.
Are wire shelves or solid shelves better for plants?
Open wire or slatted shelves let light and air pass to the level below, which helps when light comes from above or at an angle. Solid shelves shade the level beneath them but work well when each level faces a window or has its own light. Both need waterproof trays under the pots.
Where should I put a plant shelf in a room?
Beside or facing a window is the simplest choice, because natural light then reaches every level to some degree. The top shelf and the window-side edge of each level will be brightest. If the only free wall is dim, plan a light for each level before you set the shelf heights.